9/8/20

SAIL AWAY WITH ME ON MY WATERCOLOR PAINTED SAILBOATS 🛥️

 © 2020 Runway Sewing. All Rights Reserved.


Here's a fun project you can personalize and wear! I used watercolor to paint these pretty sailboats but you can paint or draw whatever you'd like! I created an engineered (placement print) shirt. You will need heat transfer paper for inkjet printer, iron and a shirt. No sewing required!

Make an Original one of a kind outfit with your own artwork that you created 🎨🖌️


sailboat shirt

I painted a few different colorful sailboats using watercolor. You can adjust the size of the drawing in the computer after you scan it, so don't worry too much about the scale of the boats. Just don't make them too small in case you want to scale up.

 
Here are the 4 sailboats I painted.


Scan the finished painting after it drys into the computer. Multiply the boats in Photoshop (or whatever software you are using) so it covers the entire page. This way you save paper, in case you need more boats.

Please read and follow the instructions that came with your heat transfer paper.

Make sure to Mirror the image when printing. See the screen image on the left and printed mirror image on the right.


Cut the images close as possible to the edge of the outside lines.


Place the cutouts on the shirt to decide on the placement. Here I tried all over print, but I didn't like it. The boats were too scattered and the size didn't look right. I decided instead to enlarge some of the boats and make the design into an engineered or a placement print shirt.


I taped the cut outs to visually see the placement before I ironed them permanently onto the shirt.


Then I ironed each boat per instructions that came with the heat transfer paper. It said to not use steam.


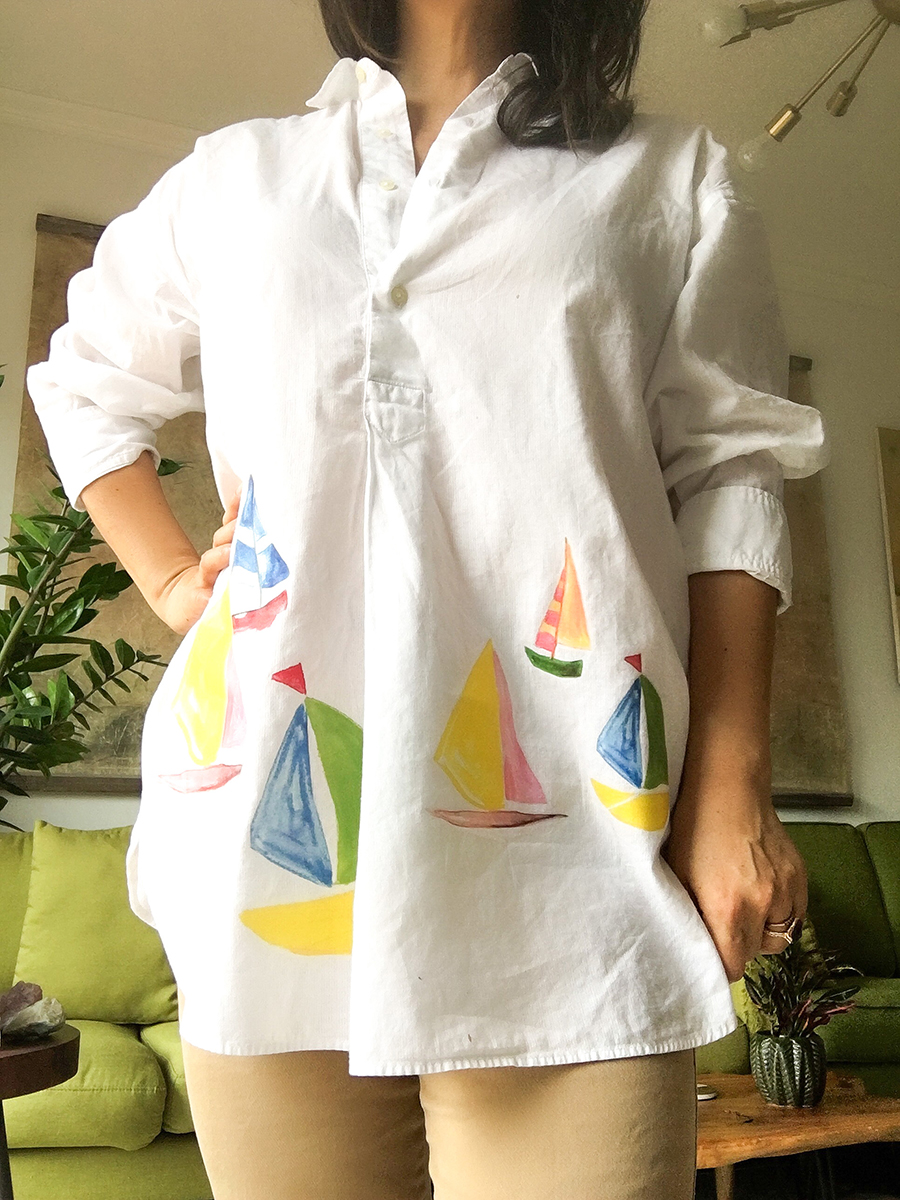
 Voila! Here is the final result. I only added 3 small boats to the back of the shirt, so it's not so busy looking. I think it came out pretty cute!! I am happy with this shirt. I was getting bored of wearing this white shirt so I'm glad I was able to upcycle and make it new again!


I think adding this little touch to a plain white shirt makes it fun to wear and so unique! Try this for yourself and see what you can come up with. Good luck! ❤️ Jee


2/3/20

DIY HANDMADE HEART WIRE PENDANT NECKLACE YOU WILL LOVE!


© 2020 Runway Sewing. All Rights Reserved.


Hello Everyone! I am back! Sorry I've been MIA for 5 years! Feels longer because I've been missing updating the blog posts for so long. I am happy to report I will be consistently posting DIY tutorials among other new exciting things going forward!

While I've been gone, I've been really getting into making my own jewelry and will be sharing many DIY ideas and projects not only for fashion sewing but also for jewelry making with you all! An outfit is not complete without accessorizing y'all!

For this project, you will need basic jewelry pliers and 20 GG wire. I used brass round wire.
Since we are in the month of February and Valentines day is around the corner, you can make these necklaces to give as a gift or make them for yourself!

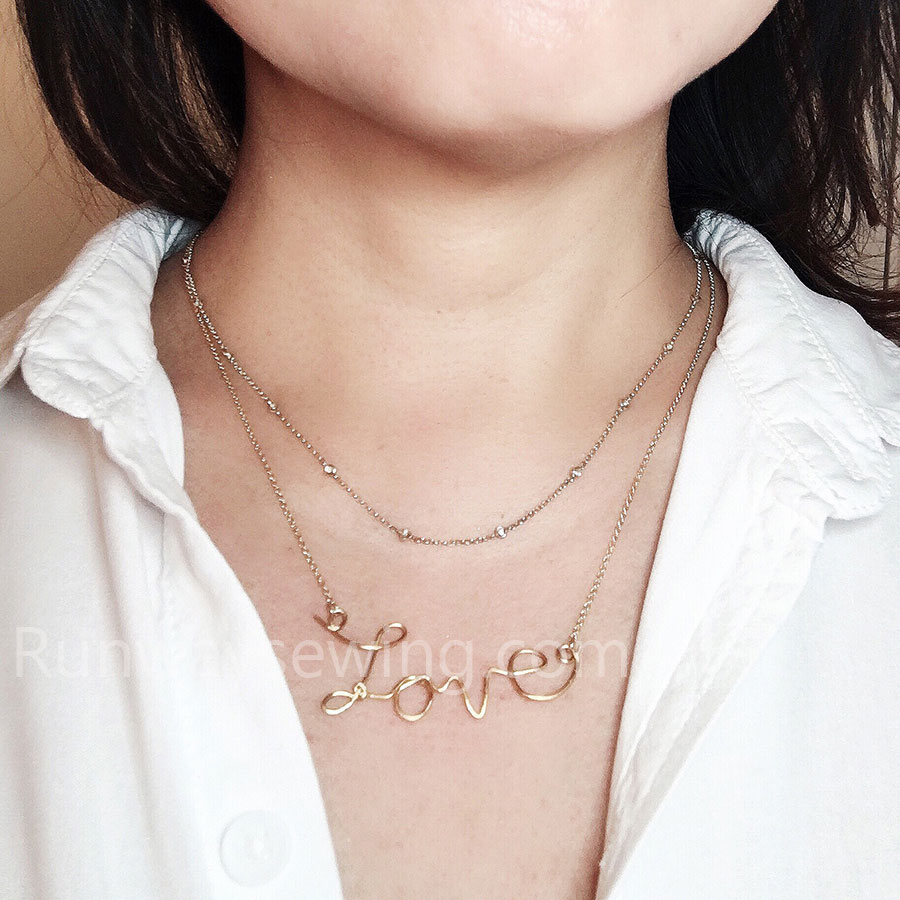
 Here is my finished Love Script Necklace, layered with my diamond chain. To add color, I also layered it below with my custom made London blue Topaz and diamond necklace.

 As a bonus, here is a heart shaped pendant necklace!


I personally love how big it is! It makes it so unique and pretty. 
 
Here are the pendants together. I think they came out pretty great. It is so easy to make and so fun! You can also try making a single letter initial or name pendant as well. I really think these would make a great personalized gift for someone special!

Here's how I made it! Please note, this is not a step by step tutorial. You can search on the internet on how to connect a chain to a pendant etc... Here I am giving you some basics on how I made these two unique jewelry pieces! 

Here are the basic steps!
1. Draw/Write the word Love on a piece of paper to the actual size and look of how you want the pendant to look. Make sure the line is continuous from end to end. Add loops at each end of the word for the jump rings to connect the pendant and chain together.

2. Use a flat and round nose plier to achieve the shape of the letters.

The same technique goes for making the heart shaped pendant necklace.

3. Once the pendants are complete, you will need to attach the chain to the pendant by jump rings.
4. Optional: I used a chasing hammer to flatten out the round wire for texture and to make the lines irregular. The flat areas also reflect more light making the pendant shine!

Voila! There you have it! So simple and easy to make. No soldering required. All cold connections! 

I hope you enjoyed this diy project and are inspired to make your own wire pendant necklace! 

Have fun creating and check out my next project coming soon! Until next time, Take care!

xo

Jee